
Webgains Transaction Management
Our Transaction Management tool gives you a single, central place to review and manage adjustable Webgains-tracked orders with confidence.
From here, you can confirm, cancel, or amend transactions to keep order values accurate and up to date.
The tool supports both transaction-level management and item-level adjustments, so you can view a full order or drill down into the individual tracked items within it. For example, if one item in a larger order is returned, you can cancel that item only and the overall transaction value will update accordingly.
The Transaction Management tool will only show transactions/items that are still within their ‘editable’ state. If a transaction has already been confirmed or cancelled, it will not be included in this tool, but you can still use our Reporting to view the transaction details.
Handle transaction adjustments at item level in bulk
This feature gives you greater control over your transactions, as you can cancel or adjust transactions in bulk at either transaction level or item level. For item-level changes, individual items within transactions can be cancelled or adjusted simultaneously, with the transaction and commission values then updating automatically in accordance with the tracked commission rule. Batch adjustments help you manage unconfirmed transactions on a bigger scale.
We know transaction management can be an admin-heavy task, so this feature is designed to make things smoother and more flexible. It helps you handle transactions more efficiently before they're confirmed, making daily tasks easier.
You can download a CSV file with the transactions in the correct template for processing, choose whether to make changes at transaction level or item level, then upload the file back into the Webgains platform to apply the changes in bulk. There is no limit to the number of transactions that can be updated.
Adjusted transactions will recalculate sale value according to the items cancelled/adjusted, and commission amount according to the tracked Smart Commission rule.
If you are only needing to cancel/confirm/adjust a few transactions, you can do so within the Transaction Management tool interface directly.
Learn more: Transaction Management - Confirm, Cancel or Adjust Transactions and Items | Webgains Transaction Management
How it works
High-Level Workflow
-
Download the Transaction/Item Report CSV which shows the transaction-level or item-level (respectively) information for transactions within your filtered selection.
-
In the file, make changes like cancelling items or adjusting sales values. Instructions can be found within the file template, and explained further below in this guide.
-
When you're done, upload the file to apply the updates.
-
Check back in the platform Upload History to see if the file has been processed successfully and correct any errors if necessary.
Before You Start: Transactions vs Items
A transaction represents the entire order.
An item represents an individual product or line within that order.
Use the action that matches the change you are trying to make:
|
I need to... |
Use |
|---|---|
|
Approve an entire order |
Confirm Transaction |
|
Cancel an entire order |
Cancel Transaction |
|
Cancel one product within an order |
Cancel Item |
|
Change the value of one product within an order |
Adjust Item |
If your change affects the entire order, work from the Transactions tab.
If your change affects only part of an order, work from the Items tab.
For Transaction-Level Confirm/Cancel
Using Transaction Upload for approving or cancelling multiple transactions in bulk.
Step 1 - Download the Transaction Report
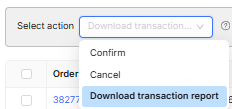
View the Transactions tab. You don’t need to select any transactions, just select the action and click Download the Transaction Report.

Step 2 - Make the adjustments in the file
Once you’ve downloaded the file, you can open the CSV in an application such as Excel and edit the required transactions. The file will include instructions on row 2 for what each column represents and how to use it.
Populate the Action column with confirm or cancel. If you are cancelling, you will also need to enter a very short entry in the ChangeReason column, to show why the transaction is cancelled (e.g. ‘Refunded'). Here’s a list of suggested change reasons.
-
Another marketing channel was credited with the sale
-
Unauthorised voucher code used
-
Transaction cannot be traced
-
Order returned by customer
-
Order cancelled by customer
-
Order refunded
-
Fraudulent transaction
-
No payment received
-
Duplicate
-
Out of stock
-
Minimum deposit/wager not met
-
Validation criteria not met
-
Transaction violates merchant PPC terms
-
Test transaction
An example file format is below:
|
ProgramId |
ProgramName |
TransactionId |
OrderReference |
TransactionStatus |
TransactionValue |
Action |
ChangeReason |
|
Webgains program ID (can't edit) |
Program name (can't edit) |
Webgains transaction ID (can't edit) |
Your order reference (can't edit) |
Webgains transaction status (can't edit) |
Transaction value (can't edit) |
Action to be applied to transaction (confirm, cancel) |
The reason of the cancellation (required for cancel) |
|
12345 |
Webgains Demo Program |
2724792894 |
4567890 |
delayed |
11.67 |
confirm |
|
|
12345 |
Webgains Demo Program |
23972419813 |
789789 |
delayed |
87.23 |
cancel |
Whole order returned |
|
12345 |
Webgains Demo Program |
982717124134 |
6543876 |
delayed |
54.30 |
confirm |
|
The fields in grey should not be edited and are for reference only, it’s just the last columns that are used to make changes.
You will receive an error if you change the column values marked as Do Not Edit.
Step 3 - Upload the file
Important: The ‘instructions’ row (Row 2) in the CSV must be included in the upload.
Upload the file using Upload Adjustments.
If there are any immediately obvious issues in the file upload attempt (e.g. no data or a badly formatted file), you will be alerted immediately in the platform.
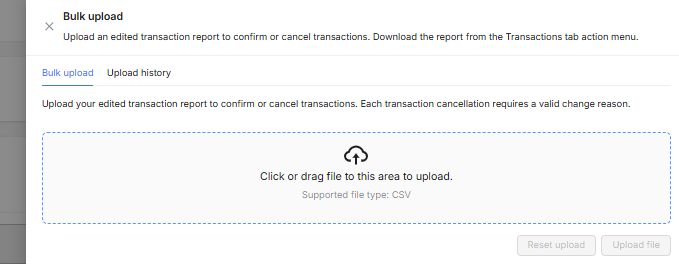
You can then upload the file for processing by dragging it into the upload area. The file needs to be a CSV file and less than 8MB.
If there are any immediately obvious issues in the file upload attempt (e.g. no data or a badly formatted file), you will be alerted immediately in the platform.
The file will then be checked for any errors and to see if the transactions can be edited before the transactions are updated. This may take some time for a very large file uploads.
You will receive an email saying whether the file has been processed successfully or whether there are any errors.
After the file is uploaded and then processed, you will receive an email to confirm the outcome of the processing.
Step 4 - Check the file has been processed
In the upload history panel, you'll be able to see a list of transaction adjustments file that have been uploaded and whether they have been successfully processed.
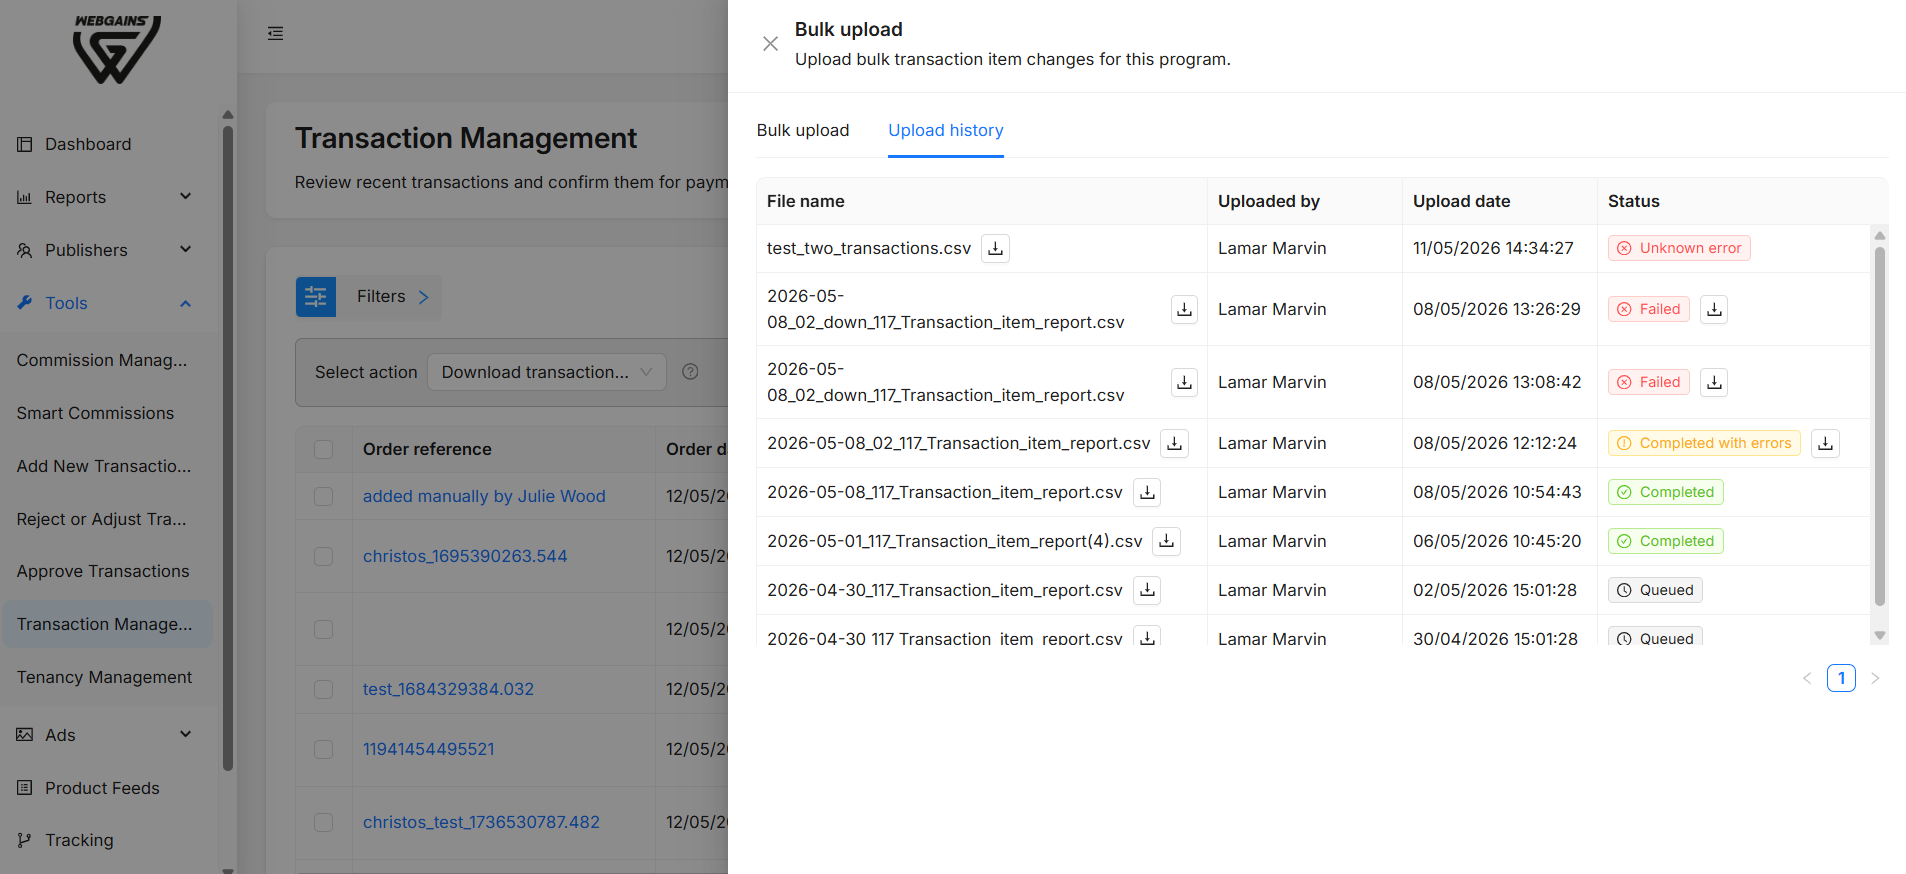
There are 3 possible outcomes:
-
Completed – the file has completed with 0 errors and all of the adjustments have been made
-
Failed/unknown error – the file could not be processed at all. The whole file needs to be reuploaded
-
Completed with errors – in this scenario some of the changes couldn’t be made. Next to the status you’ll see a download icon which will download a list of issues in the uploaded file. You’ll need to correct these issues, and reupload only the transactions which have errors.
-
Common errors may include;
-
Modified values not added for Adjustments.
-
Change reason not provided.
-
Transaction is already cancelled, or recall period has already passed.
-
Transaction could not be found.
-
You will receive an error if you change the columns marked as Do Not Edit.
-
-
If you require any support using this feature, or managing your transactions, please contact your Webgains account manager/point of contact.
For Item-Level Adjustments
Step 1 - Download Transaction Item Report
Transaction item editing is performed from the Transaction Management page.
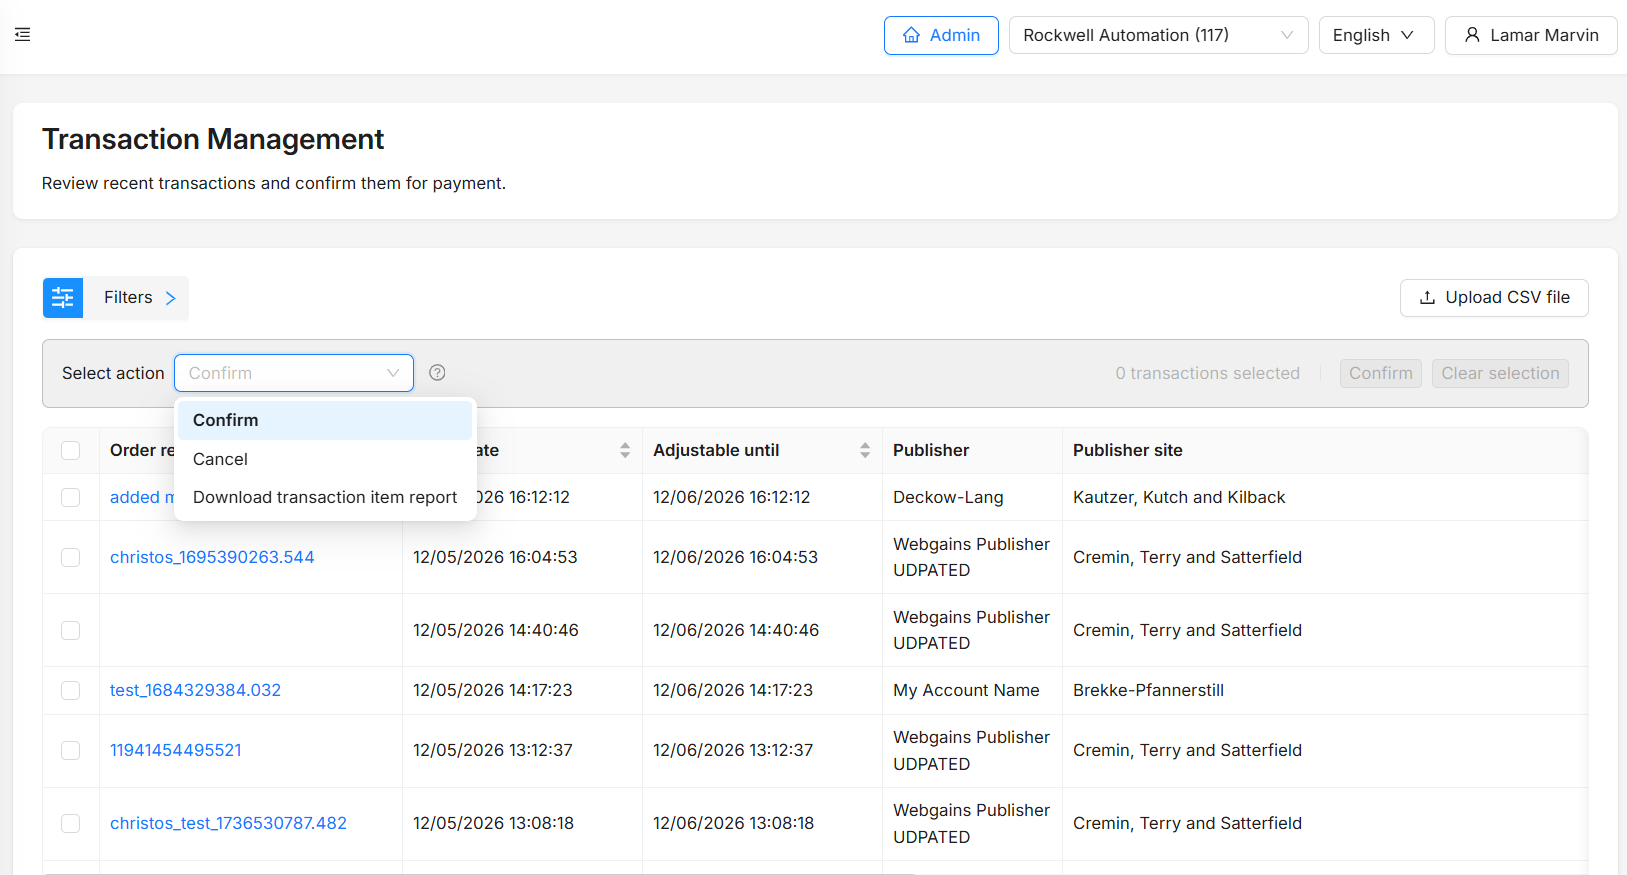
To select the transactions to be edited you’ll need to download a Transaction Item Report. This a CSV file of transactions where each row shows an item within a transaction.
Without selecting any individual transactions, you can download all transactions that are still editable.
You can use the filters change the date range, specify particular publishers or enter individual order references. You can also select transactions included in the file by selecting rows in the transaction table using the checkboxes.
Step 2 - Make the adjustments in the file
Once you’ve downloaded the file, you can open the CSV in an application such as Excel and edit the affected transaction.
The ‘instructions’ row (Row 2) must be kept within the file - do not remove this row.
|
TransactionId |
TransactionDate |
OrderReference |
TransactionStatus |
TransactionItemId |
TransactionItemName |
TransactionItemCommissionType |
TransactionItemStatus |
TransactionItemValue |
TransactionItemAction |
TransactionItemModifiedValue |
ChangeReason |
|
Webgains transaction ID (can't edit) |
The date of the transaction (can't edit) |
Your order reference (can't edit) |
Webgains transaction status (can't edit) |
Webgains item ID (can't edit) |
Item name (can't edit) |
Item commission type (can't edit) |
Item status (can't edit) |
Item value (can't edit) |
Action to be applied to item (adjust, cancel) |
New item value |
The reason of the adjustment/cancellation |
|
85049609 |
2026-05-12T12:12:37 |
11941454495521 |
confirmed |
53848953 |
Item 1 |
|
confirmed |
12 |
cancel |
|
Item returned |
|
85049609 |
2026-05-12T12:12:37 |
11941454495521 |
confirmed |
53848955 |
Item 2 |
|
confirmed |
12 |
adjust |
11 |
Item price changed |
|
85049609 |
2026-05-12T12:12:37 |
11941454495521 |
confirmed |
53848957 |
Item 3 |
|
confirmed |
12 |
|
|
|
The fields in grey should not be edited and are for reference only, it’s just the last columns that are used to make changes.
You will receive an error if you change the column values marked as Do Not Edit.
To make adjustments, you’ll need to enter an Action in the TransactionItemAction for the specific item you want to change
The actions are:
-
cancel
-
adjust
To cancel an item, enter cancel in this column in the row for the item you want to to cancel. You will also need to enter a very short entry in the ChangeReason column, to show why the item is cancelled (e.g. ‘Returned').
To adjust an item, enter adjust in this column in the row for the item you want to adjust the value of. In the transactionItemModifiedvalue column enter the new value for the item. Again, you 'll need to enter a short reason in the ChangeReason column.
Step 3 - Upload the file
Important: The ‘instructions’ row (Row 2) in the CSV must be included in the upload.
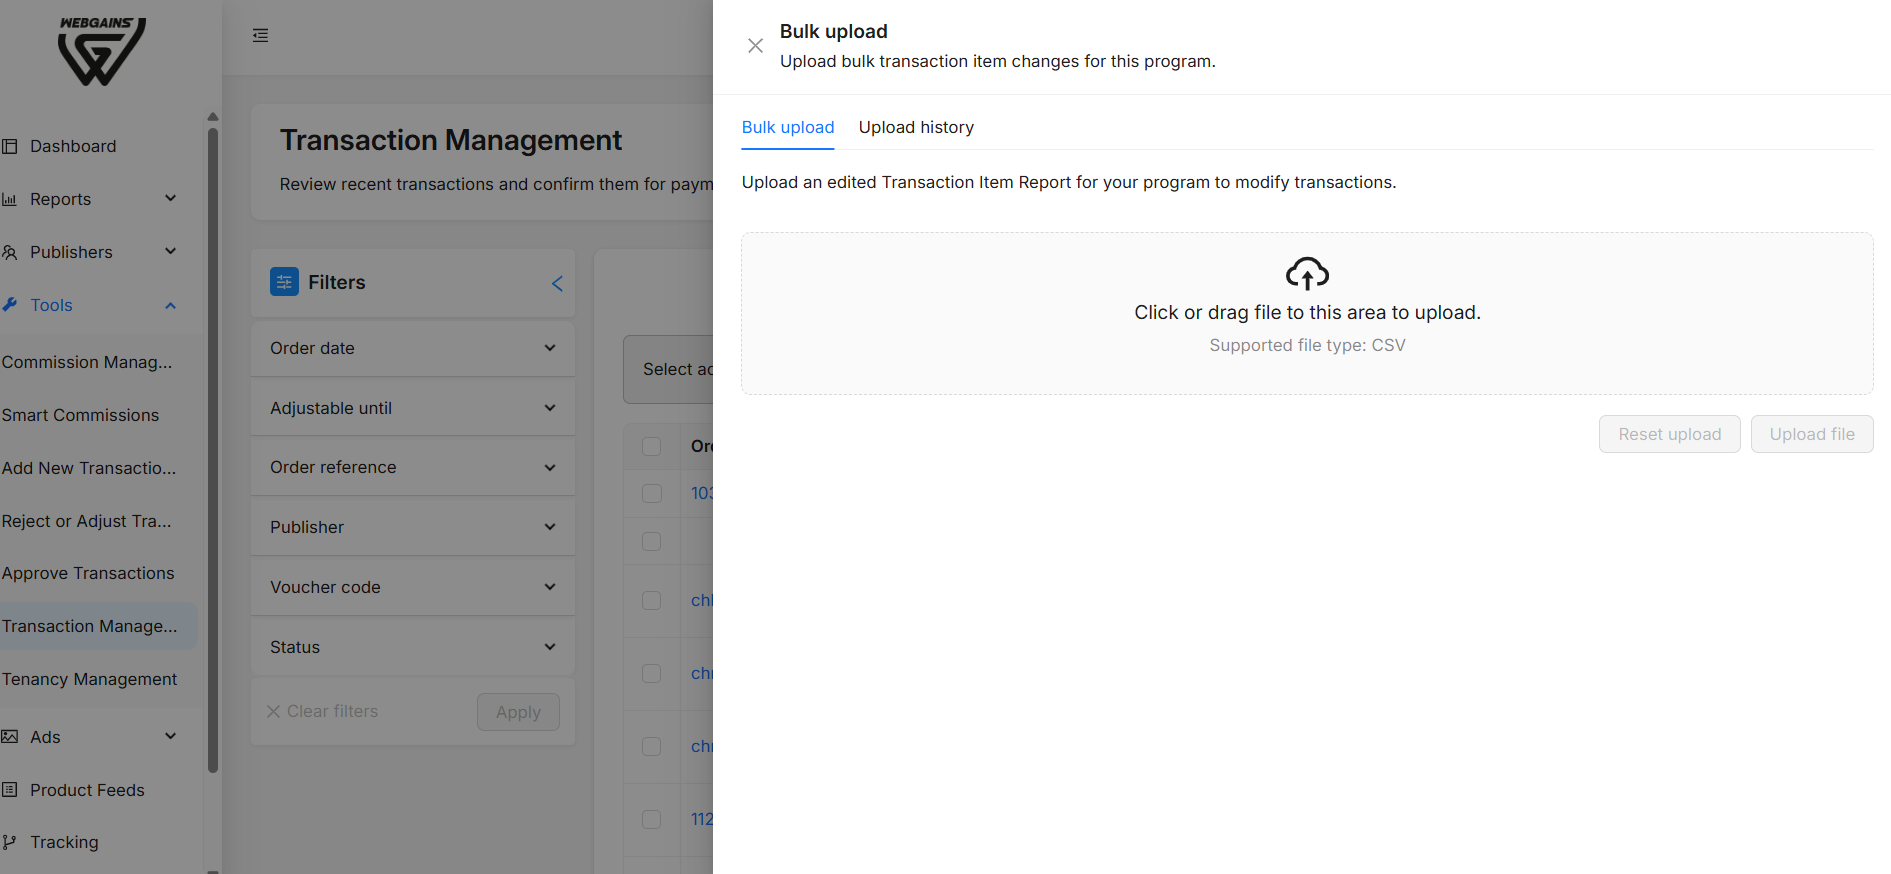
You can then upload the file for processing by dragging it into the upload area. The file needs to be a CSV file and less than 8MB.
If there are any immediately obvious issues in the file upload attempt (e.g. no data or a badly formatted file), you will be alerted immediately in the platform.
The file will then be checked for any errors and to see if the transactions can be edited before the transactions are updated. This may take some time for a very large file uploads.
You will receive an email saying whether the file has been processed successfully or whether there are any errors.
After the file is uploaded and then processed, you will receive an email to confirm the outcome of the processing.
Step 4 - Check the file has been processed
In the upload history panel, you'll be able to see a list of transaction adjustments file that have been uploaded and whether they have been successfully processed.
There are 3 possible outcomes:
-
Completed – the file has completed with 0 errors and all of the adjustments have been made
-
Failed/unknown error – the file could not be processed at all. The whole file needs to be reuploaded
-
Completed with errors – in this scenario some of the changes couldn’t be made. Next to the status you’ll see a download icon which will download a list of issues in the uploaded file. You’ll need to correct these issues, and reupload only the transactions which have errors.
-
Common errors may include;
-
Modified values not added for Adjustments.
-
Change reason not provided.
-
Transaction is already cancelled, or recall period has already passed.
-
Transaction could not be found.
-
You will receive an error if you change the columns marked as Do Not Edit.
-
-
If you require any support using this feature, or managing your transactions, please contact your Webgains account manager/point of contact.