
Webgains Tracking Implementation with Google Tag Manager
Webgains Tracking Implementation with Google Tag Manager
Here you can find information about integrating as an advertiser with Webgains via Google Tag Manager, which consists of two pieces of code that need adding to your site that allow us to track conversions generated by Webgains affiliates.
Prior to this, please ensure you have your Program ID, and have been contacted by your Webgains Integration Manager regarding the set-up.
To comply with the regulations governing cookies under the GDPR and the ePrivacy Directive you must receive users' consent before you use any marketing cookies, including the landing page script.
Step 1 - The Landing Page Script
The Landing Page Script must be placed on every page of your website. It is used to record our WGU value to track where the request has originated from (which campaign) so we can track sales to that publisher campaign for that session.
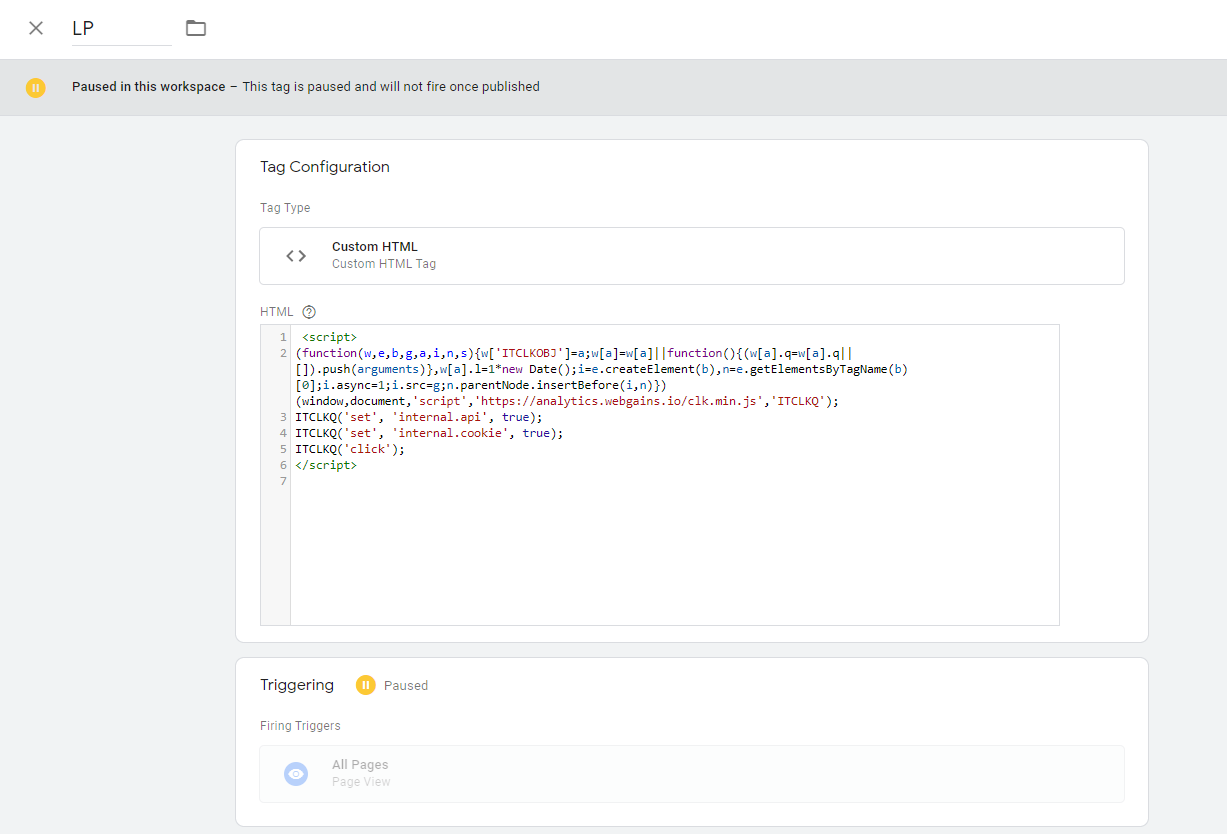
Firstly, you need to create a Custom HTML Tag (you can name this tag “Webgains Landing Page Script”, or similar) and add the below code, replacing “XXXXXX” in line 9 with your unique program ID. If you are unsure of your program ID please speak to your Integration Manager.
<script>
(function(src) {
var o = 'ITCLKQ';
window[o] = window[o] || function() {(window[o].q=window[o].q||[]).push(arguments)};
window[o].l = 1 * new Date();
var s = document.createElement('script');
var f = document.getElementsByTagName('script')[0];
s.async = 1;s.src = src;f.parentNode.insertBefore(s,f);
})('https://analytics.webgains.io/XXXXXX/main.min.js');
ITCLKQ('set', 'internal.api', true);
ITCLKQ('set', 'internal.cookie', true);
ITCLKQ('click');
</script>
We also use this script to activate our additional Publisher Services, should you wish to work with any. More information on this can be found here, and the services can be activated within your account under the Tracking page.
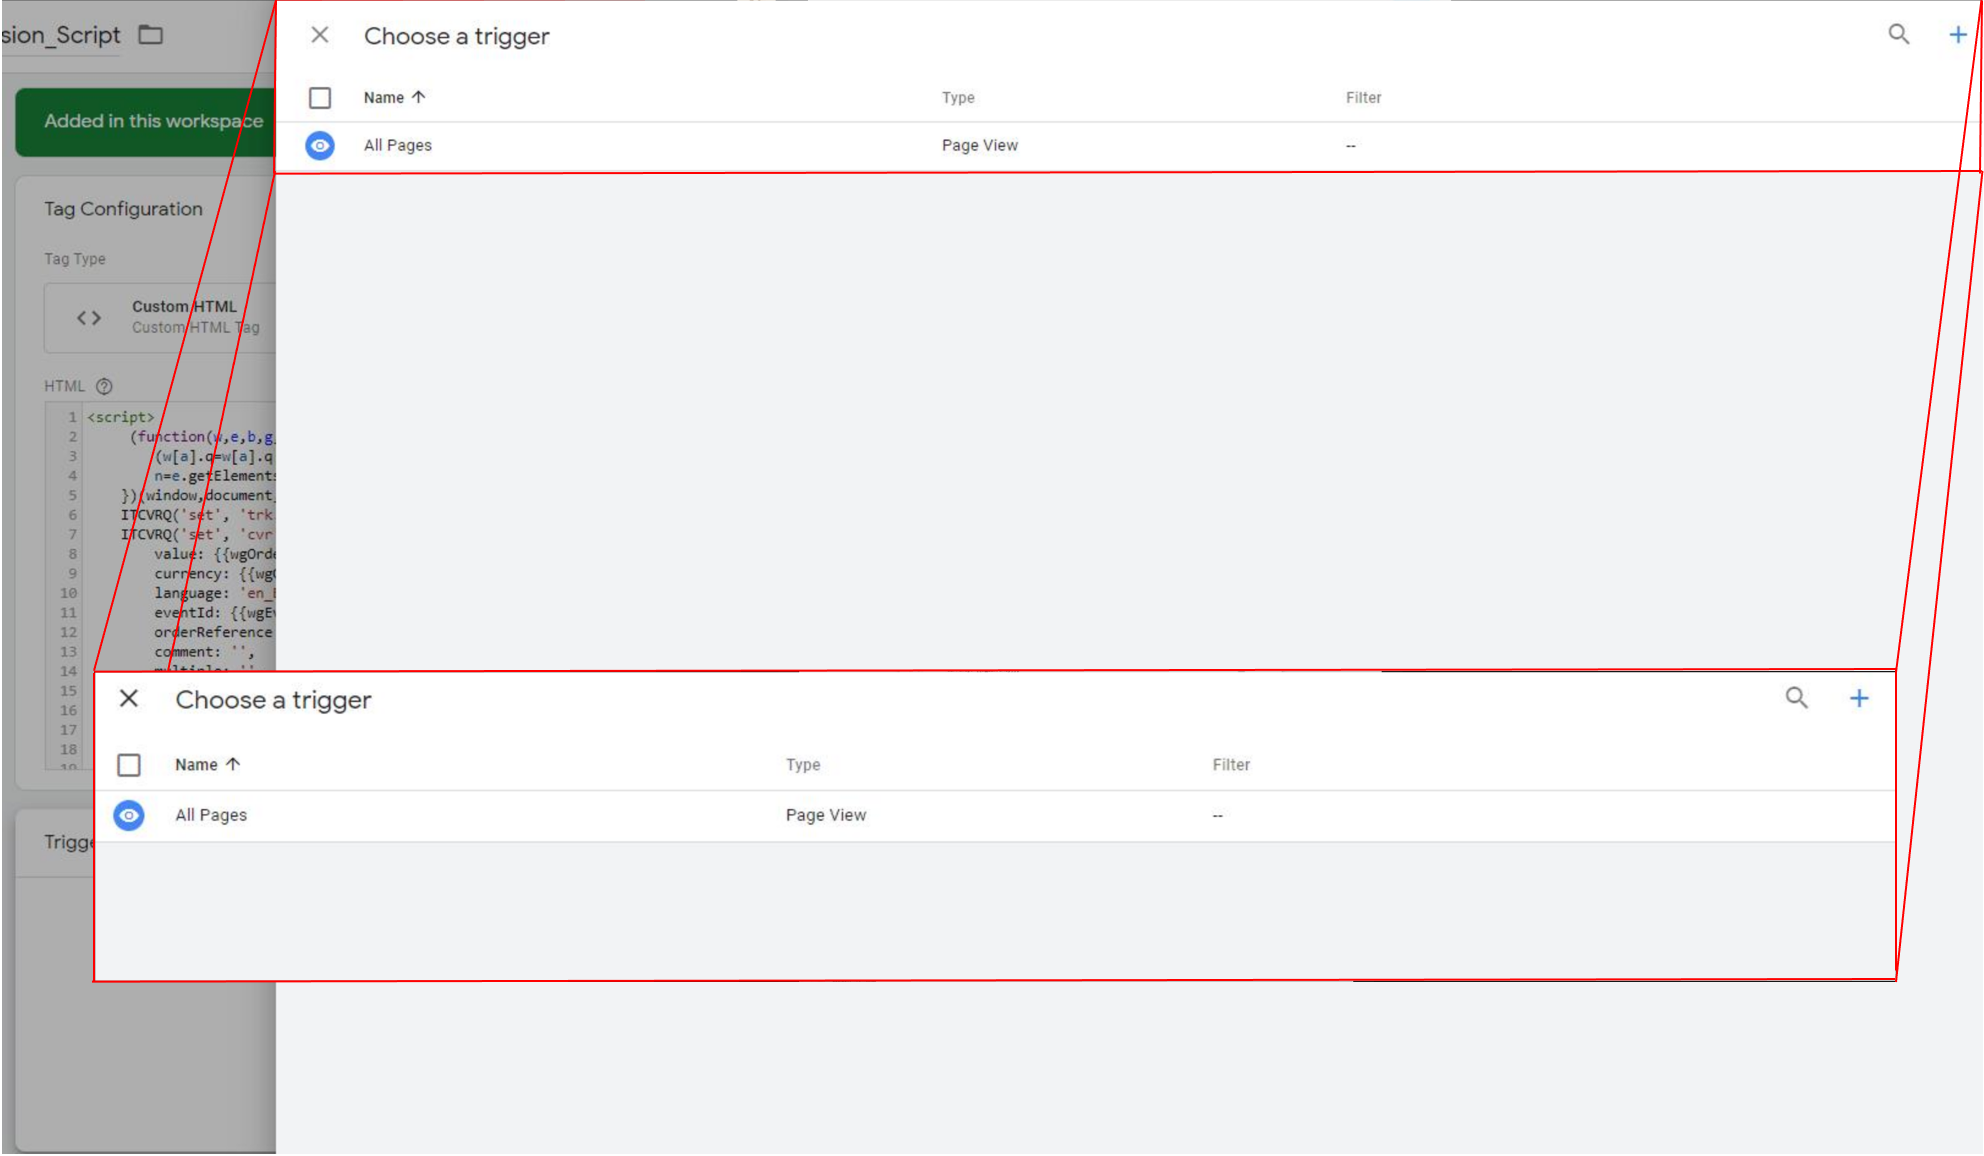
This script needs to be added to every page of your website, so you should set the firing trigger to “All Pages”, to load on “Page View”. This will ensure the script loads on all pages.
Step 2 - The Conversion Script
The Conversion Script must be added at the bottom of the site order confirmation page. That is, the page a customer reaches after successfully completing a sale.
It is important that our tracking code is present on the order confirmation page at all times as we have a "cookieless" tracking method which we will invoke, should our servers find no affiliate cookies on the user's browser. Like all our tracking, if we don't find any "cookieless" or traditional cookies, we will not record a sale.
The tracking code consists of various elements that you report back to us. Depending on the type of commission you have opted for, some of the variables are omitted accordingly.
Please note that the below setup is generalised for GTM and are only examples. To view more details on setting up the conversion script please visit our guide on Webgains Default Tracking Implementation .
Step 2a - Creating User Defined Variables
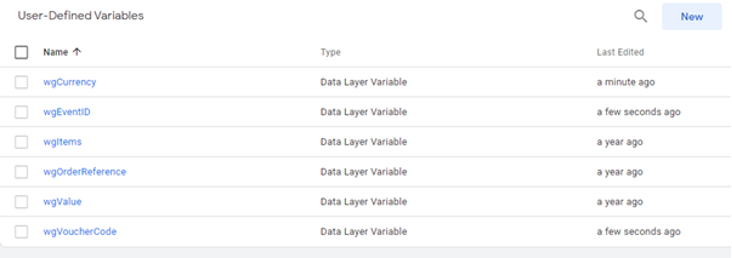
Navigate to the GTM overview page and choose “Variables” from the left-hand side menu; then scroll down until you see a section called “User-Defined Variables”.
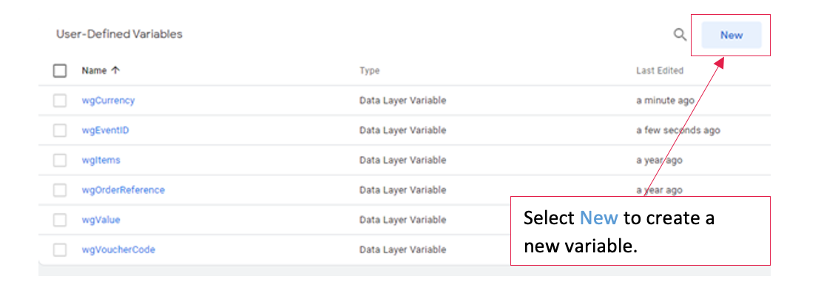
Here you will create the variables for GTM. In the image above, the variables have already been created. To create variables, press “New”, you will be prompted with the following screen:
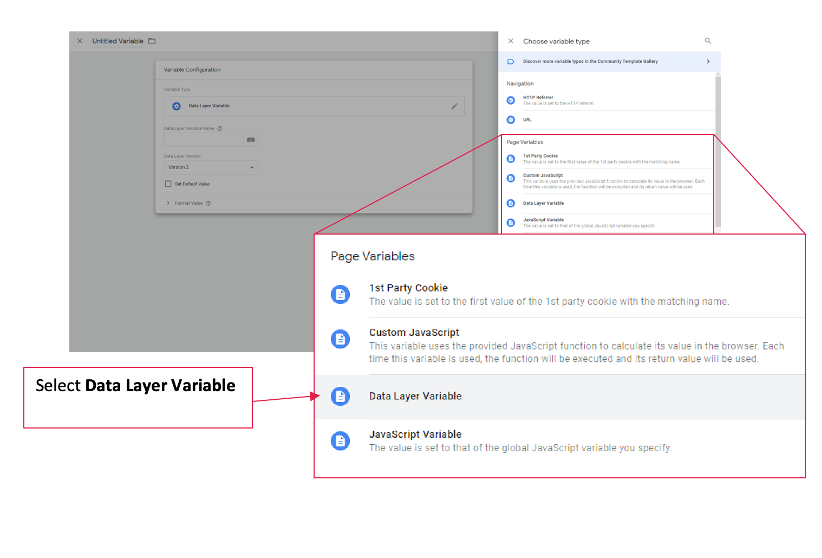
Select “Data Layer Variable”, and you will then be presented with more options:
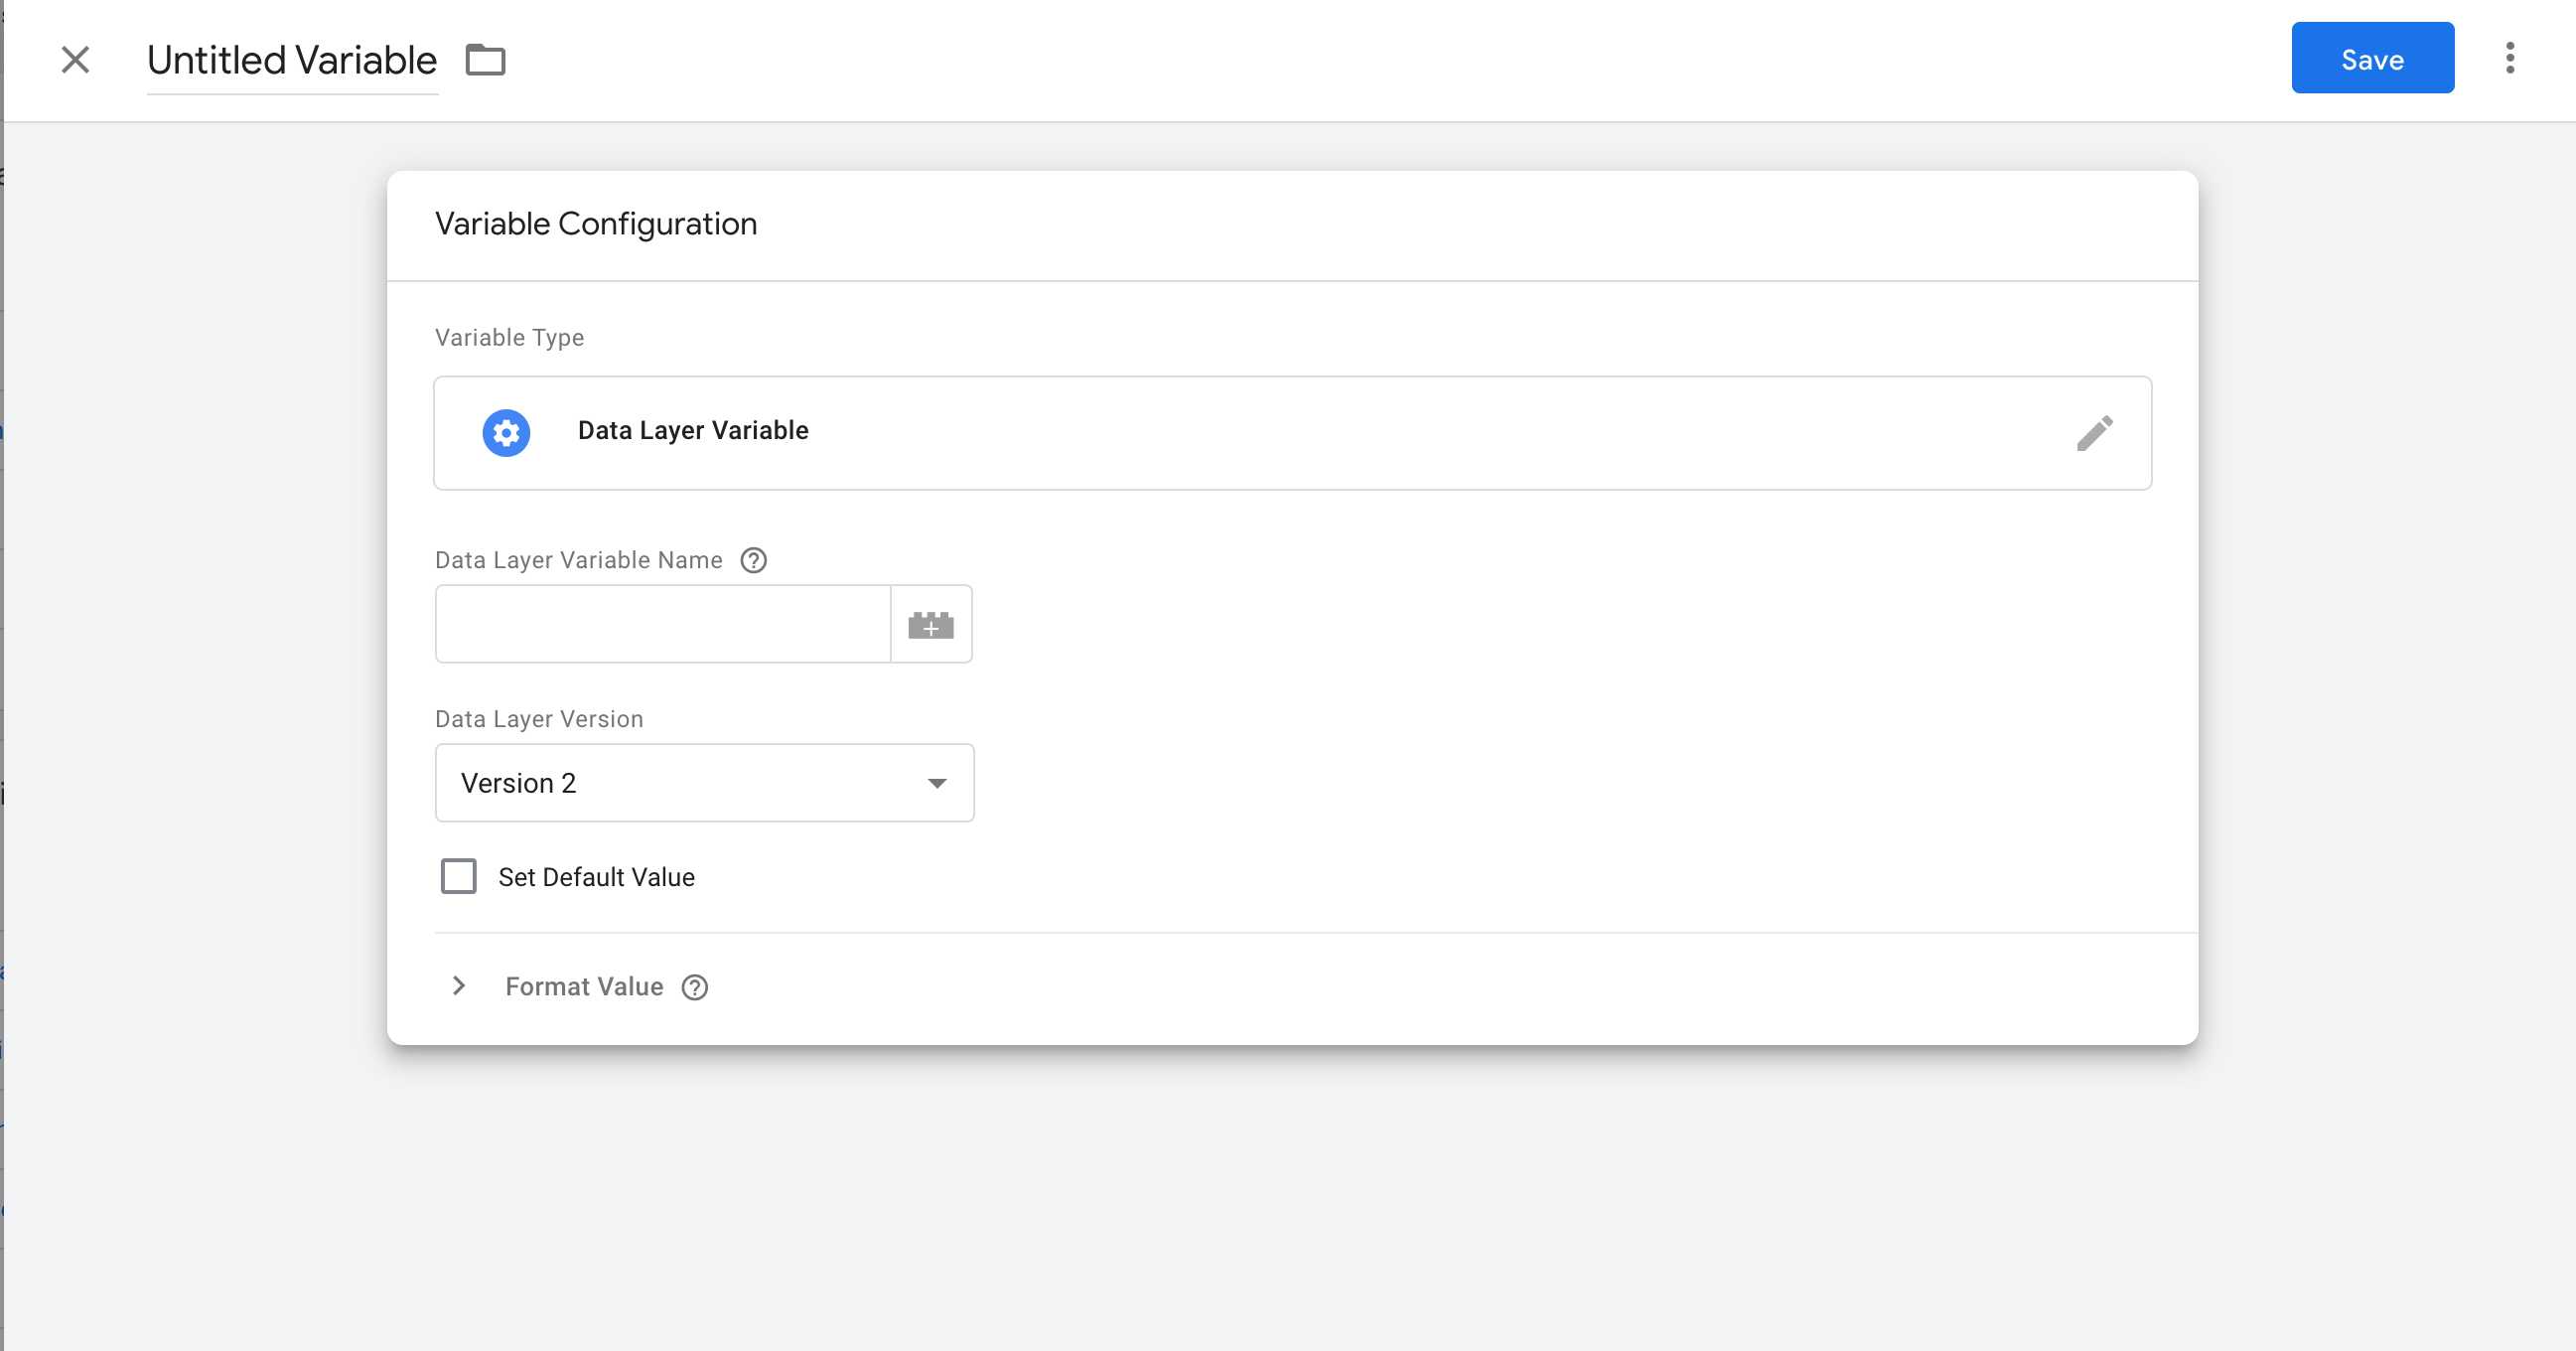
Enter the Data Layer Variable Name – this will be the information you wish to pass from your website to GTM. You can find the correct Variable Name in your Data Layer. Please speak with your developer/GTM manager if you’re having trouble retrieving this information.
Next, you want to save your User-Defined Variable, however before doing so you must give it a name. Please make sure the name matches the one you add in the Webgains Conversion Script. (e.g. For the order reference value: “wgOrderReference” would then need to pull through in the Conversion Script in the variable {{wgOrderReference}} )
Click “Save”, and repeat these steps to create the other required data layer variables using information from the table below:
Data Layer Variable Name* | User-Defined Variable Name | Data Layer Version | Variable Type | Default Value |
wgOrderReference* | wgOrderReference | Version 2 | Data Layer Variable | (Leave Blank, do not tick) |
wgOrderValue* | wgOrderValue | Version 2 | Data Layer Variable | (Leave Blank, do not tick) |
wgEventID* | wgEventID | Version 2 | Data Layer Variable | (Leave Blank, do not tick) |
wgItems* | wgItems | Version 2 | Data Layer Variable | (Leave Blank, do not tick) |
wgVoucherId* | wgVoucherId | Version 2 | Data Layer Variable | (Leave Blank, do not tick) |
wgCurrency* | wgCurrency | Version 2 | Data Layer Variable | (Leave Blank, do not tick) |
*The names of your Data Layer Variables and the ones in the table above might differ. The names of the Data Layer Variables are customisable to you, however please ensure the data is captured in the respective fields of the Conversion Script code. Please speak with your developer/GTM manager if you are having trouble.
Depending on some aspects of your program configuration, you may require additional/custom dataLayer variables. The above acts as a template, however if you require any custom variable support please speak with your Integration Manager.
Upon completion you should have a list of variables under the “User-Defined Variables” section like the one below:
Step 2b: Configuring the Tag
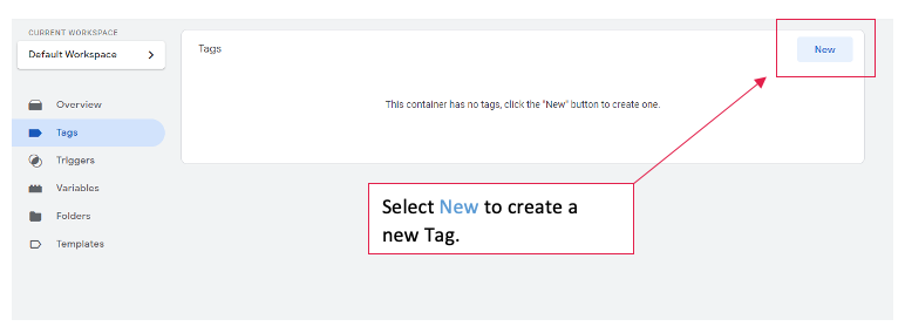
Now that we have created all the variables within the Google Tag Manager Interface, it’s time to enable the tag to capture data. Navigate back to the “Tags” section and press New.
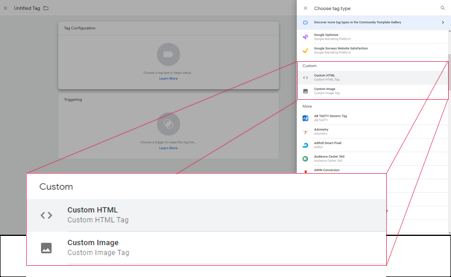
Select “Custom HTML” from the Choose tag type option:
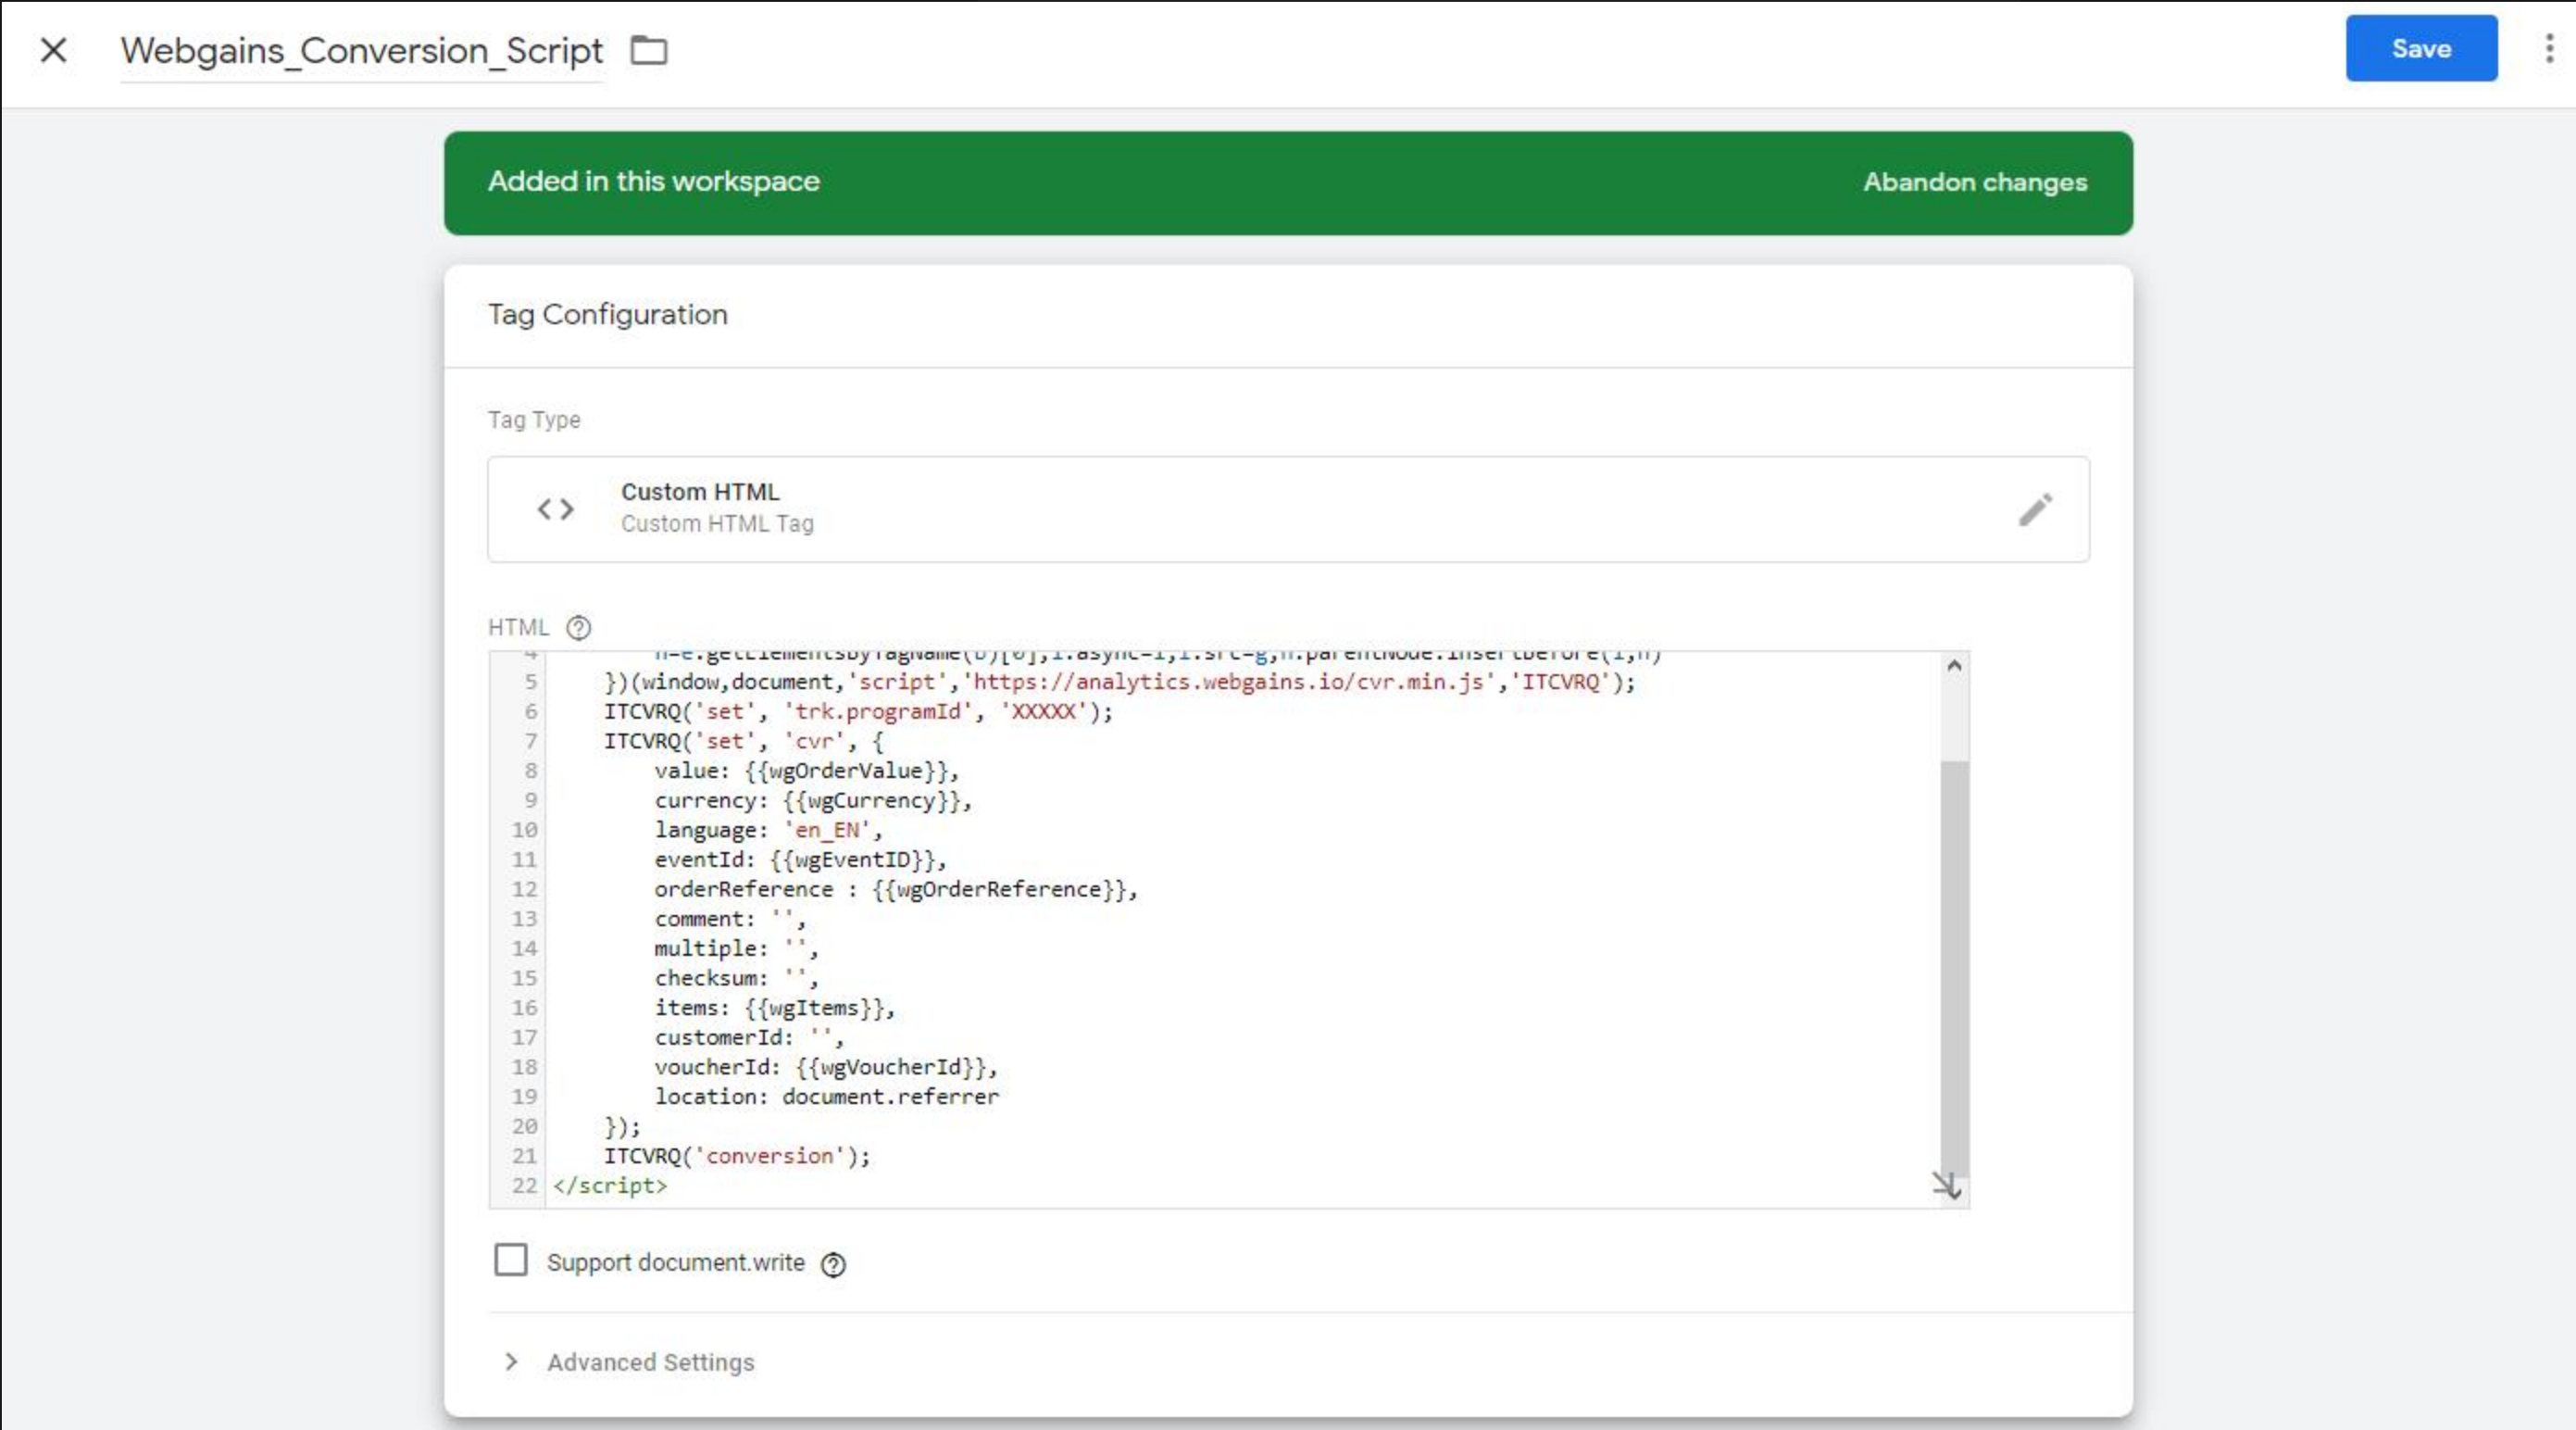
Copy and paste the Webgains Conversion Script into the HTML textbox.
Please retain spacing, quotation marks and line breaks as they are in the document. If you have used different names for the variables, please ensure that these are updated respectively.
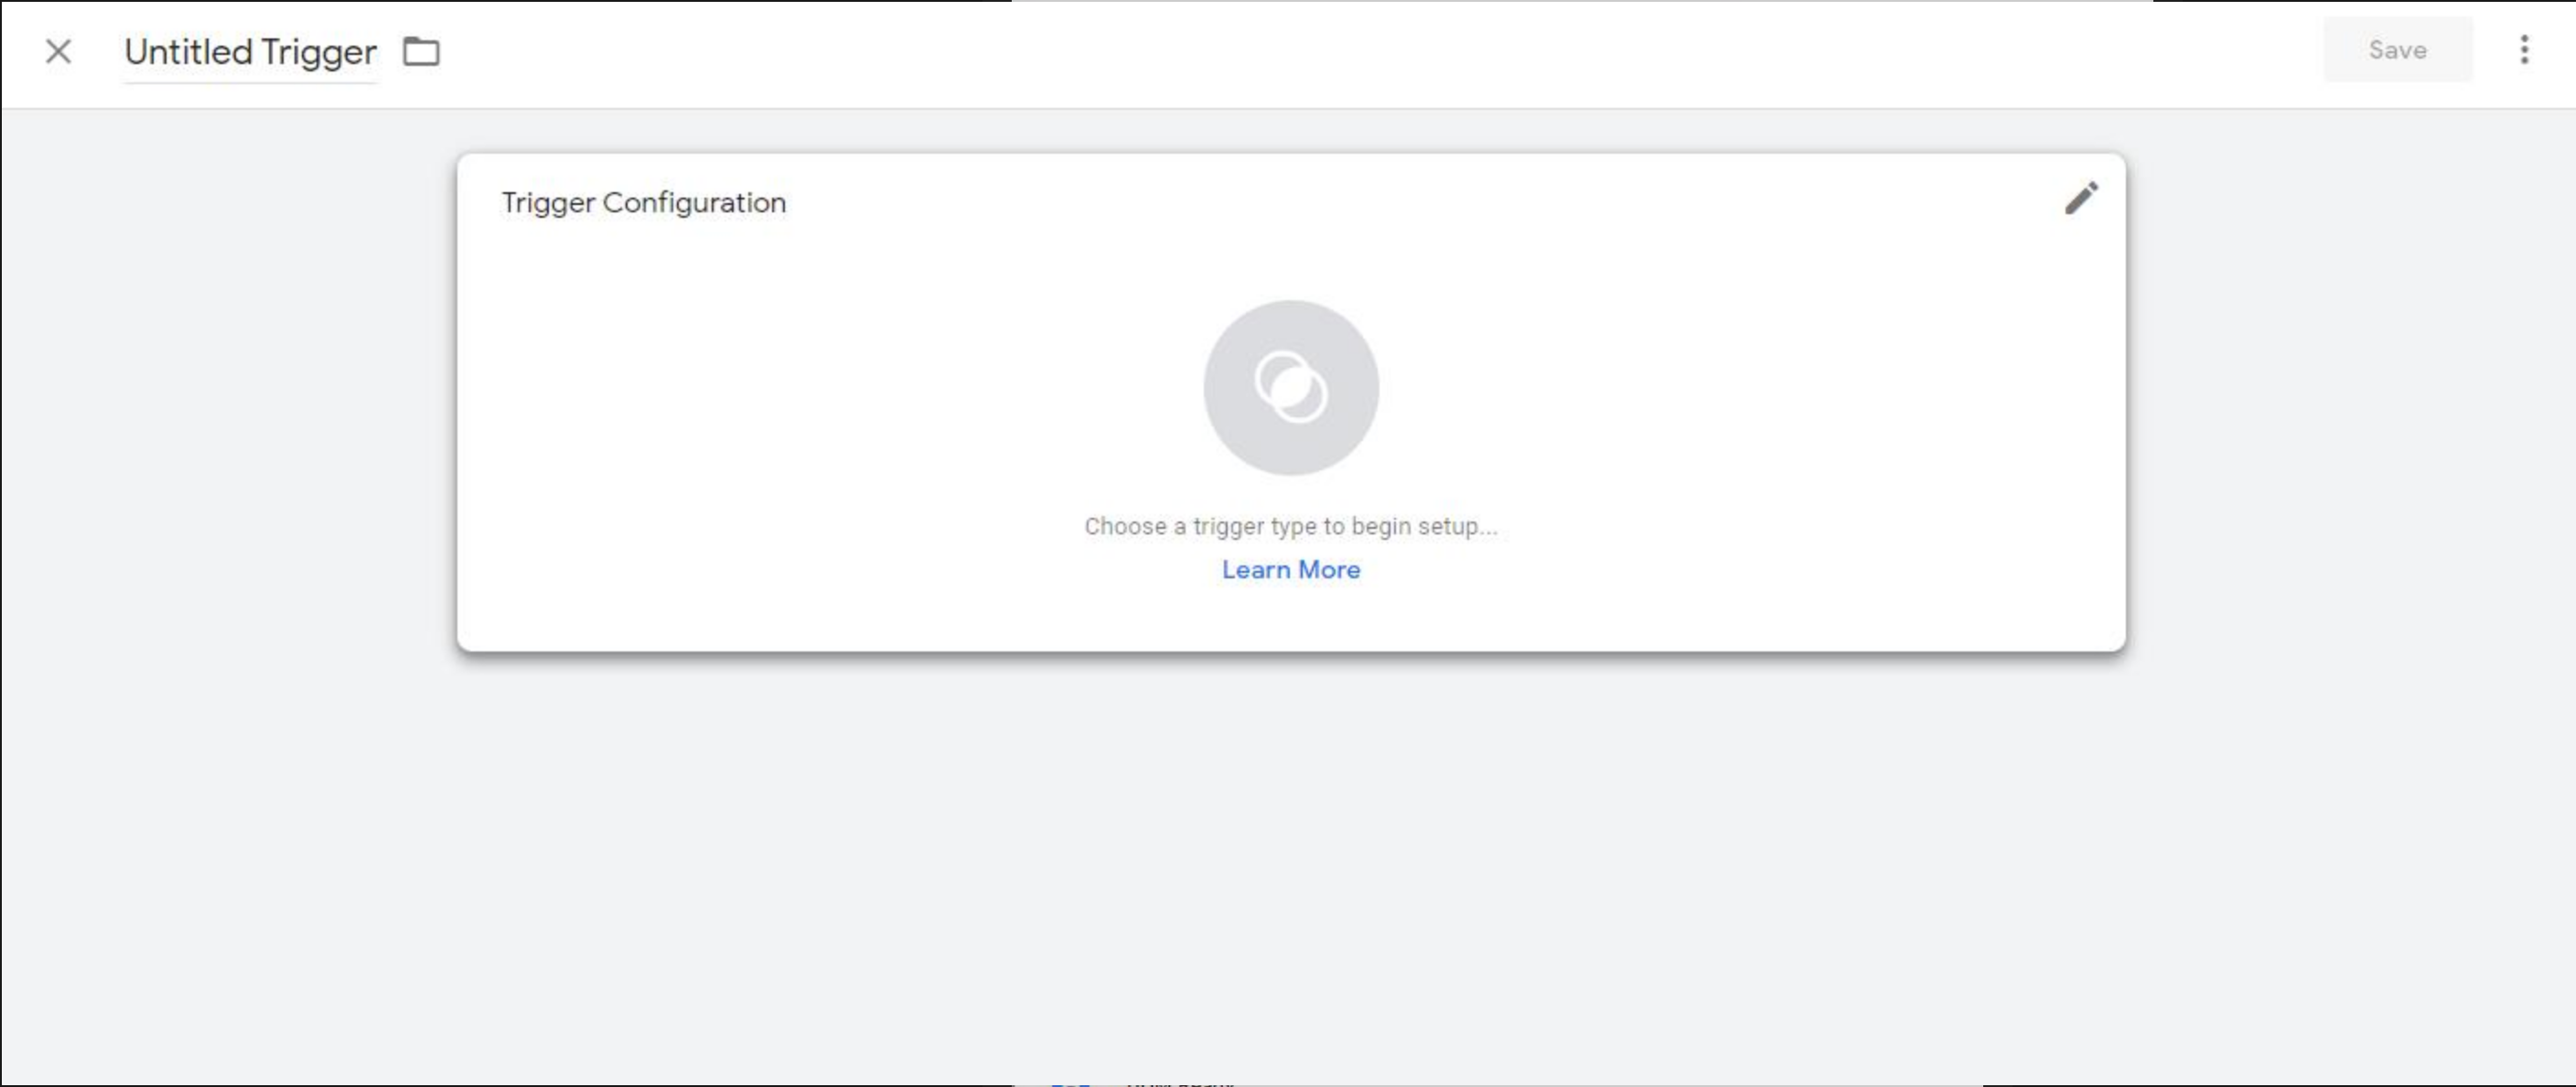
After you have completed this, please proceed to the triggering rules section just below. Here, you want to select the plus sign at the top right of the screen.
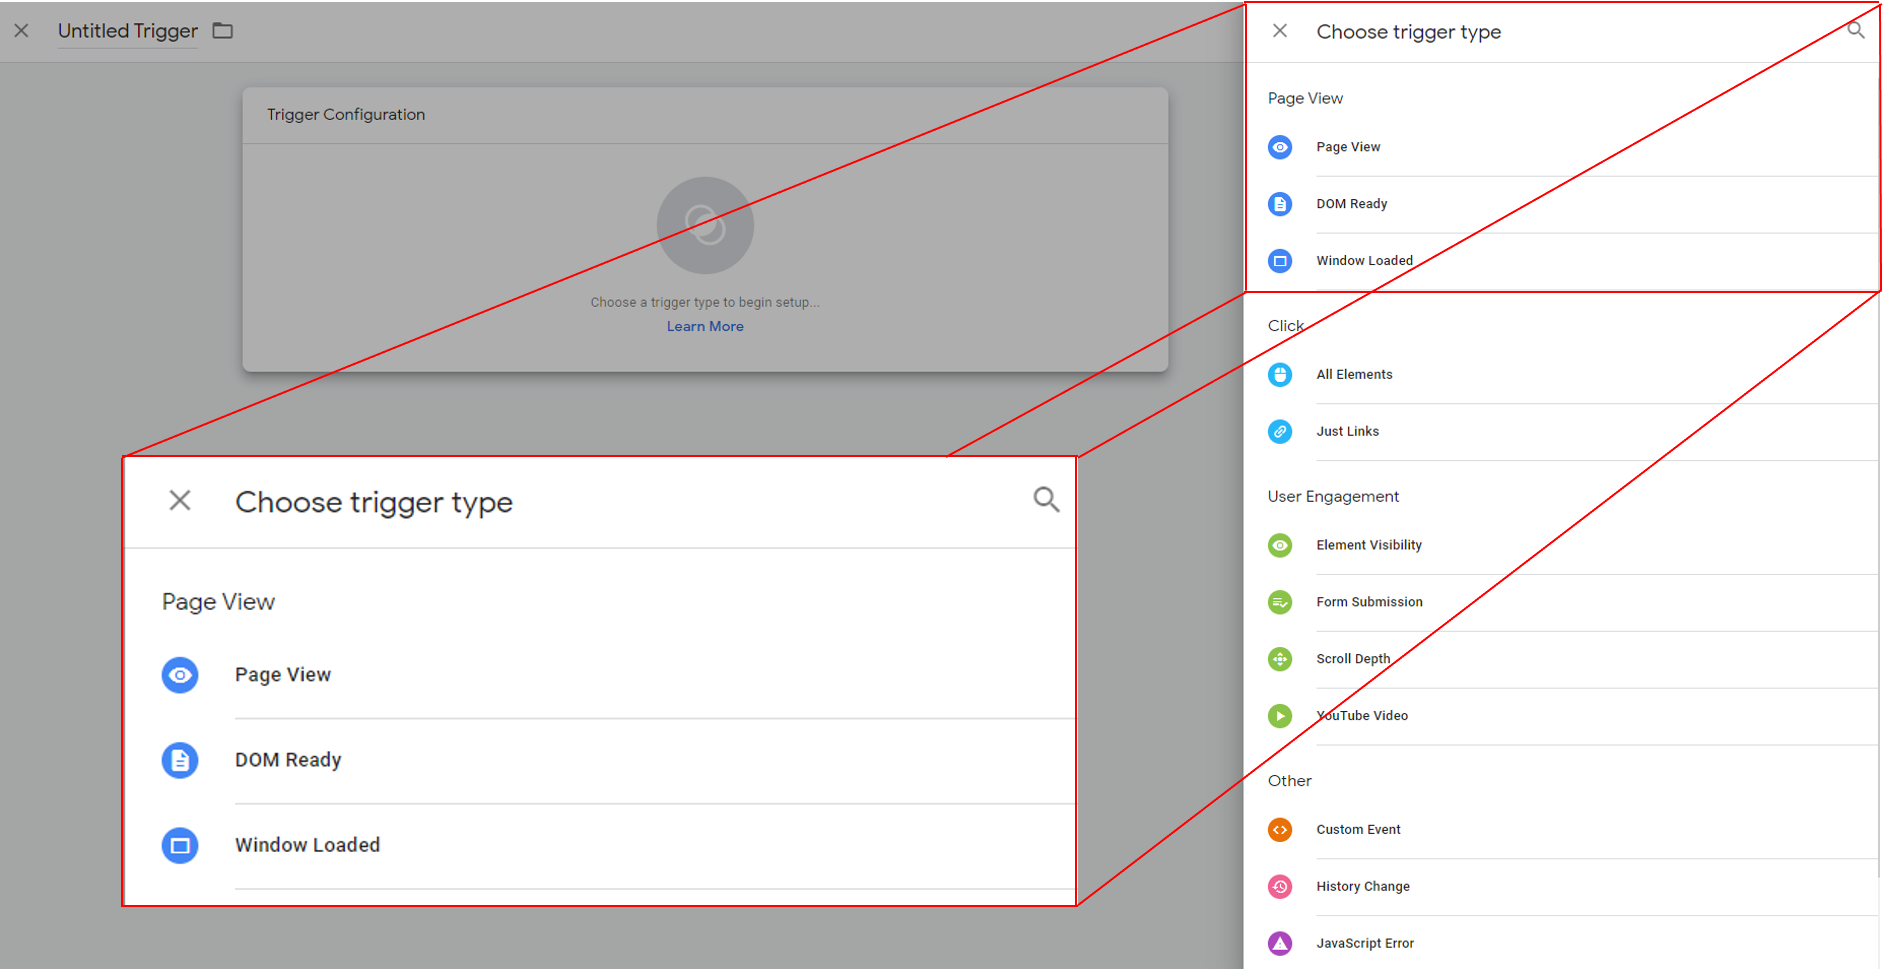
Then, click on the Triggering Configuration box where you will select the triggering type from the options available.
Select Window Loaded from the trigger types.:
Select the “Some Window Loaded Events” option, and for the triggering rules please choose ‘Page URL’ --- ‘contains’ --- ‘thank_you’ *.
*this value will depend on the name of your actual order confirmation page.
.png?inst-v=643796e5-e8ab-4f35-a980-c5bd5b0a9c8c)
Enter the name of the Triggering Rule “Confirmation_page“ at the top left of the screen and click Save.
You now want to add the trigger for the Landing Page as well. Please select the “All Pages” built-in trigger for the Landing page script and click Save.
Looking to Test your tracking? Please view here: How can I test my conversion tracking? , or speak to your Integration Manager for support.