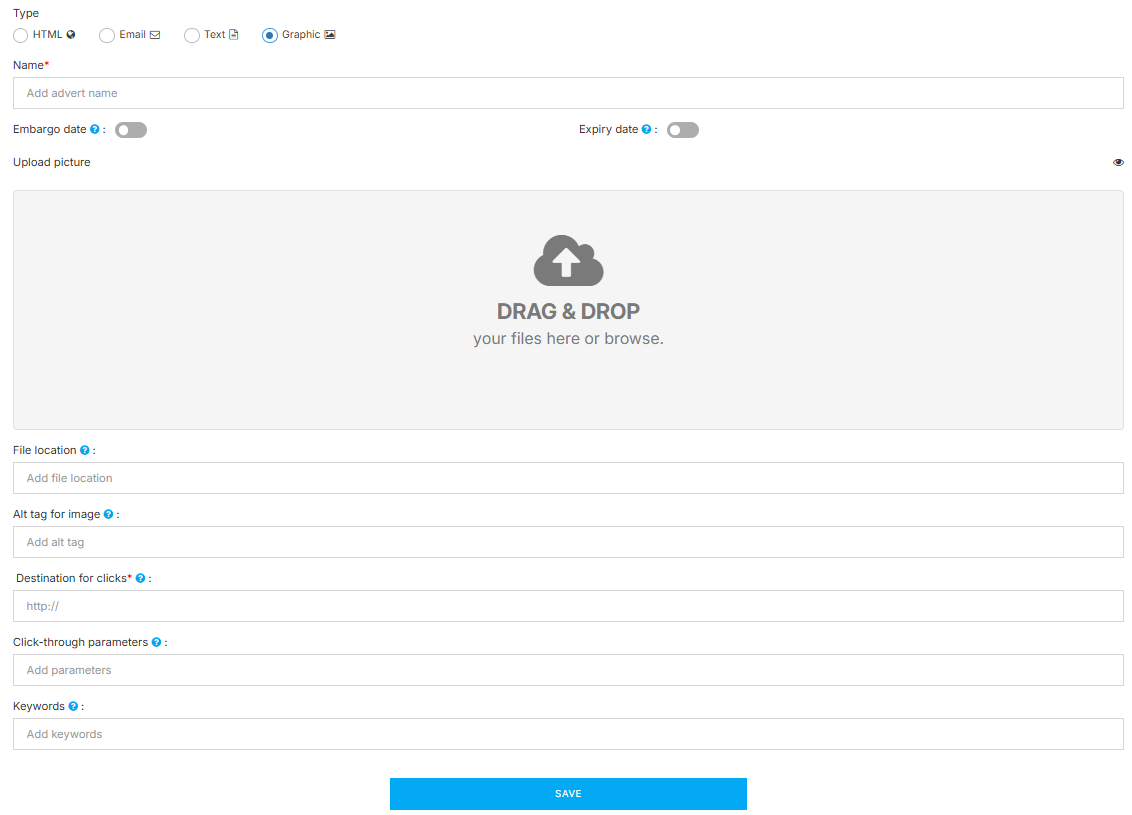
The Ads Manager section is used to upload the creative assets for your publishers to use to promote your brand on their website, such as banners and graphics, or HTML and text ads.
In order to upload the banners and ads on your program, please navigate to Ads > Ads Manager > Create An Ad and select the creative you’d like to upload.
The platform allows you to upload the following type of ad: HTML, Email, Text or Graphic.
If this is a time-limited campaign, you can select the corresponding date range.

Optional Fields:
-
Embargo and Expiry date, if you wish to schedule the Ad for a specific period.
-
File Location.
-
Alt tag for Image.
-
Click-through parameters, such as if you wish to identify specific referral traffic for that ad.
-
These will replace the parameters you have on your default program settings.
-
-
Keywords
Bulk Upload Ads
The Webgains platform allows you to bulk upload the ads at once, in case you have a large amount of Ads to upload on your program.
Step 1: If you navigate to Ads > Ads Manager > Batch Upload, you can start the batch upload process.
Step 2: You can either drop the images through the Drag & Drop, or click on the “Browse files” button to upload multiple images.
JPG, PNG and GIF formats are accepted.
The Maximum upload for each image is 1MB.
Step 3: You can Edit all ads.
“Ad name” and “Destination for clicks” are auto-populated. “Apply fields to ALL” feature helps users to apply similar features (ad name, destination for clicks, keywords, click-through parameters) to all uploaded ads at once.
Add single images to the batch using the “Add image” button. The Ad gallery displays all uploaded ads.
Step 4: “Save & finish” to complete the process and save all ads.
You can add all successfully uploaded ad to a campaign ”Add to campaign” or “Finish” to complete the process and return to the Ad Manager page.
